English Paper Piecing: Tools, Techniques & Getting Started

Tools – What tools do I need?
You only need a few essential tools to get started with English Paper Piecing: Fabric, needle and thread, scissors and the paper pieces themselves. Some quilters also like to use an acrylic template to cut their fabric.
Fabric: It is advisable to stick to good quality 100% cotton fabrics, preferably all of similar weight and ‘pre-washed’ (that way you minimise nasty surprises regarding shrinkage and running colours when your finished quilt is washed for the first time).
Needles: Good quality, fine hand-sewing needles are a must-have tool: Use the finest needles you can possibly thread, because the finer the needle, the easier it is to sew. Try to use a needle size between a no 8 and a no 10.
Thread: Good quality 100 % cotton thread of a medium to fine weight (50-80 weight) works very well, but some quilters prefer to use a thin polyester thread (Bottomline) for piecing their covered paper shapes. For best results it is advisable to match the thread colour to the colour of your fabric, and if using two very different coloured fabrics it is often the darker thread that works better (stitches are less ‘visible’).
Paper pieces: In the past quilters had to draft and hand-cut their own paper pieces, usually from old Christmas cards or catalogues, which could be a very lengthy and laborious task with varying success regarding their accuracy and consistency.
‘Pre-cut’ paper pieces take away the need to ‘cut your own’ and they became more readily available in the 1940-50’s. Today you can choose from a huge variety of different shapes and sizes of paper pieces – which is where we, as a manufacturer of pre-cut paper pieces, come into the picture. ????
Why use pre-cut paper pieces, and not make your own?
The advantages of ‘commercial’ over ‘home made’ paper pieces, are plentiful: Firstly, the accuracy of the pieces, secondly the consistency of the paper stock used and thirdly, of course, the enormous time saving. Time is precious! Wouldn’t you rather use your time to sew instead of to cut out the papers? Also, you need to be quite proficient in geometry and maths to draft the shapes correctly – or they will not tessellate (fit together) in a pattern.
What about Acrylic templates to cut the fabric, what are they?
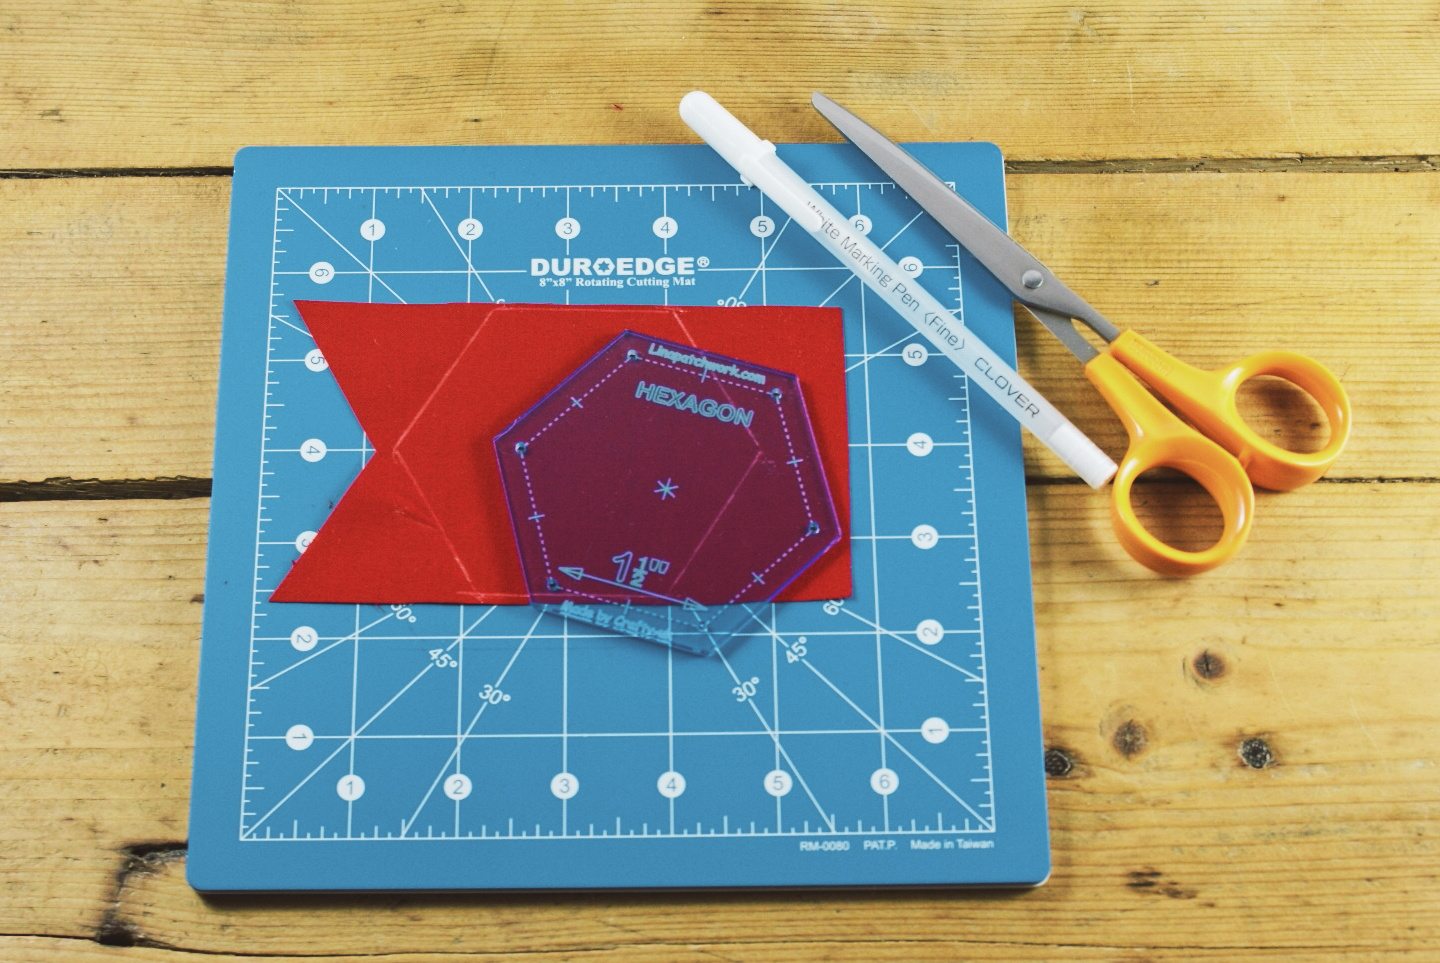
In English Paper Piecing ‘Acrylic Templates’ are used to cut the fabric patches for your paper pieces.
Briefly: You place the acrylic template on your fabric and cut around the outside with a rotary cutter. Alternatively, you can draw around the templates with a marker pen and then cut out the fabric shapes with scissors.
Acrylic templates are usually made from a clear, ‘see-through’ material (acrylic), which can have a slight colour tint (dependent on the manufacturer). They will have the shape of the paper piece marked on them and have an added ‘seam allowance’ included – therefore they are larger than the coordinated paper shape!
The size of acrylic templates is usually given as the size of the paper piece they fit with, and you can then often choose the seam allowance (either ¼ inch or 3/8th inch). Many quilters prefer the more generous 3/8th inch seam allowance for EPP because the extra fabric makes it easier to fold the edges around the paper piece.
Do I have to use Acrylic templates for EPP?
Strictly speaking: – No! Acrylic templates are not essential for English Paper Piecing!
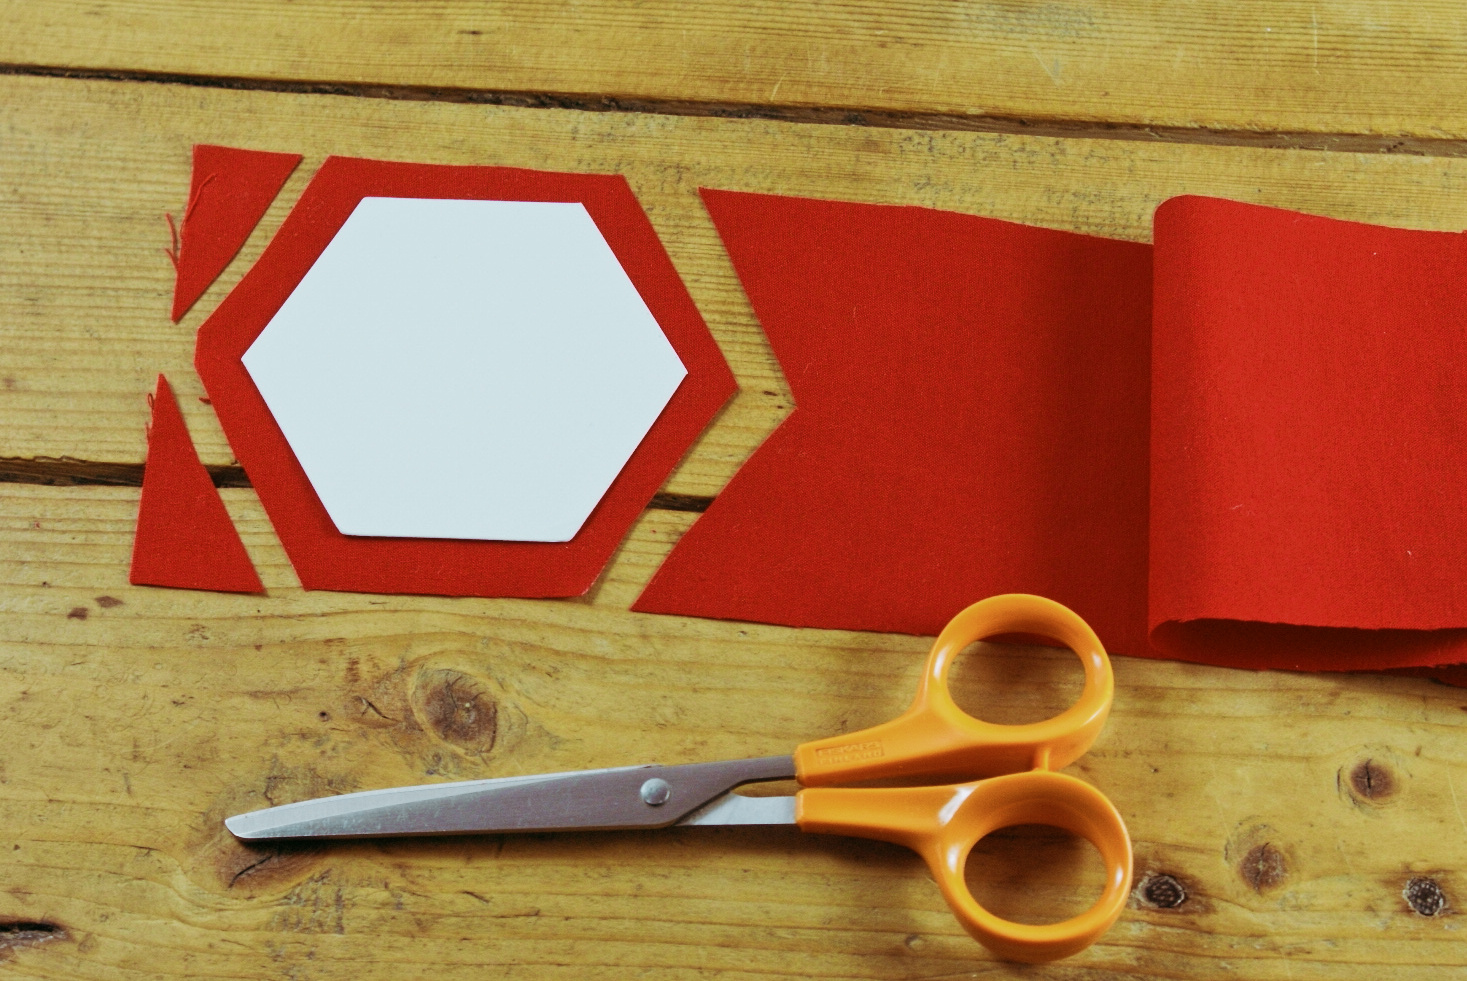
The main reason for not needing templates to cut the fabric is that you do not need an accurate or specific seam allowance when sewing EPP with paper pieces! The accuracy comes from the paper shapes themselves. You simply need a fabric patch large enough to comfortably fold it over on all sides of the paper piece. Therefore, you can just as easily cut the fabric into shape with a good pair of scissors! Simply place (or pin) the paper piece onto your fabric and cut leaving an edge of fabric around the paper piece of approximately ¼ -3/8th inch (6-8 mm). This technique works very well with fabric strips and the so-called Jelly-Rolls are great for English Paper Piecing (provided the paper shape does fit comfortably onto the strip width).
However, if you have limited mobility in your hands you may find it easier to use a rotary cutter and acrylic templates to cut your fabric, than using scissors.
What is the advantage of using acrylic templates for EPP?
The great advantage of having acrylic templates is that you can ‘fussy-cut’ your fabric!
Technique – Which EEP technique shall I use?
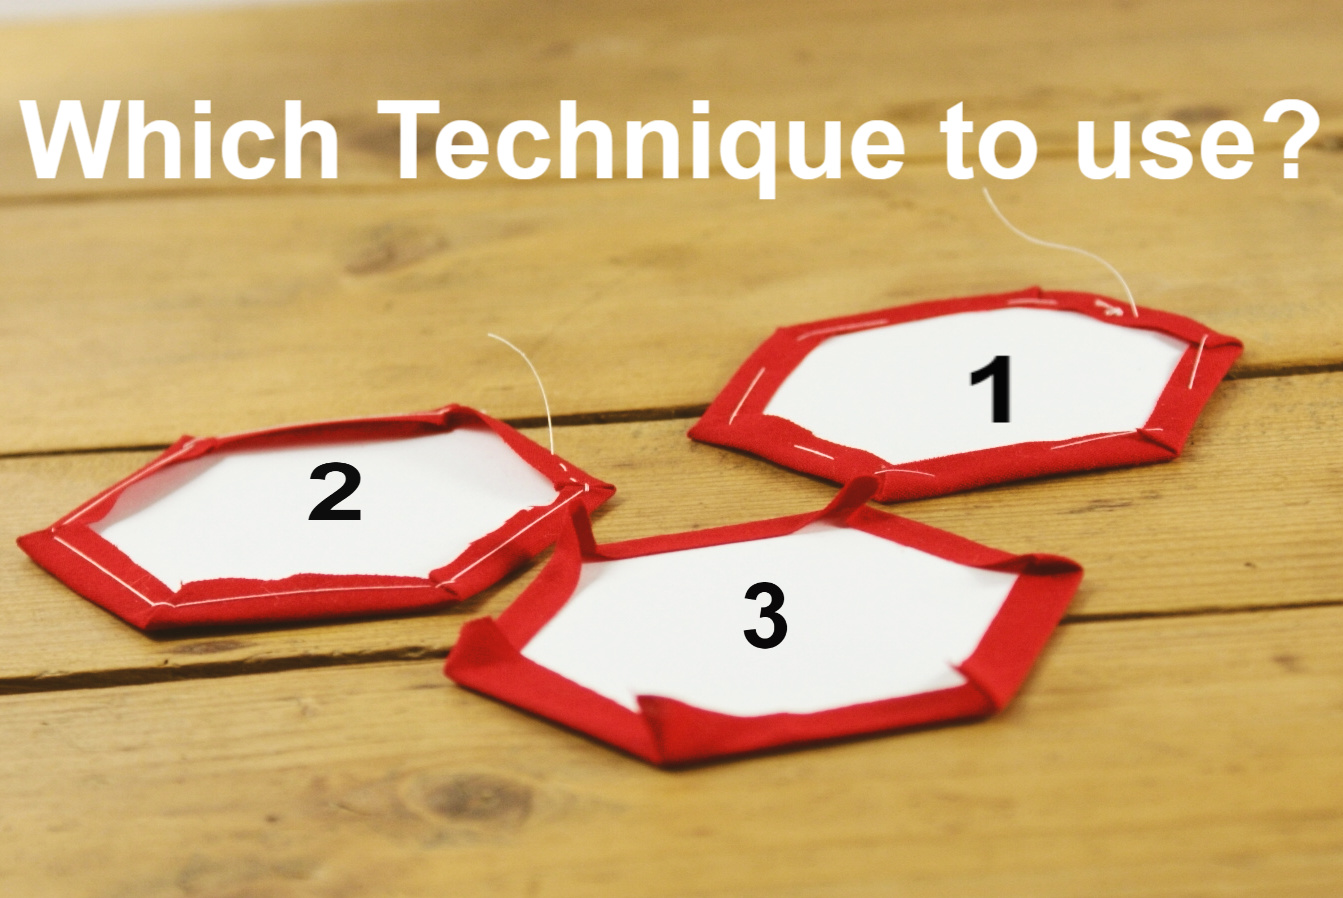
There are 3 different English Paper Piecing techniques:
Traditional ‘Thread-basting’, where we stitch through the paper piece, the ‘Corner-Catching’ method, where we thread baste (but do not stitch through the paper) and the more modern ‘Glue-basting’, which uses glue instead of thread to secure the fabric to the paper shape. Each method has its merits and therefore ‘fans’ for different reasons.
I therefore advise ‘Newbies’ to English Paper Piecing to give each method a good try and find the one (or two) that suits them best and gives the desired results.
The initial preparations are the same for all 3 EPP techniques:
Preparation:

Select the fabrics and paper pieces for the pattern you want to sew.
Place the paper shape on the wrong side of the fabric (pin in place if needed). Cut the fabric patch at least ¼ inch (6-7 mm) larger than the paper (seam allowance). You can use scissors or an acrylic template for this. It is important to have enough fabric excess to easily cover the paper shape all the way around.
Technique 1 – Thread-basting:
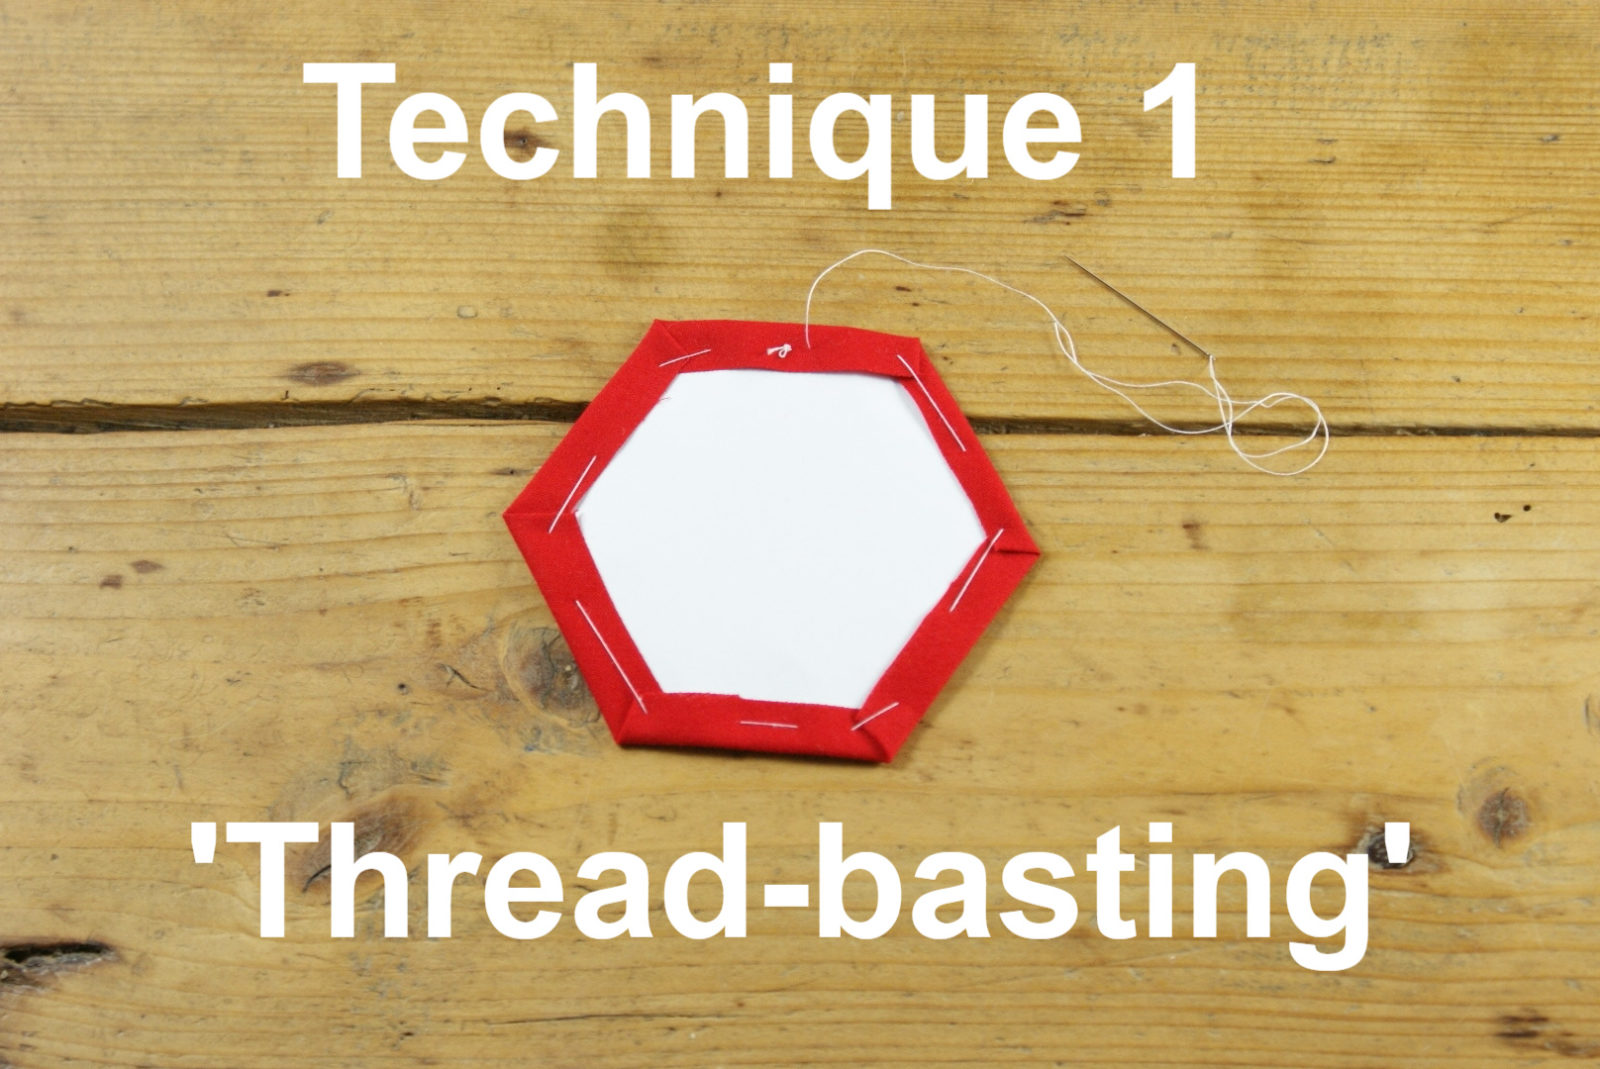

This technique, using needle and thread, is suited for paper pieces of all sizes and shapes and is one of the traditional ways to secure the fabric to the paper pieces.
Generally: As you baste your fabric to the paper piece always turn the paper piece clock-wise (if right-handed) and then fold over the fabric at the corner! All ‘folding’ should be done in the same, anticlockwise direction (turn the paper piece, fold over at the corner, secure with stitching, turn the paper piece, fold over at the corner, secure with stitching etc.) All fabric ‘folds’ should therefore lean in the same direction. This improves accuracy and avoids trouble in the future with ‘misfolded’ tails on shapes with ‘points’ (like Diamonds)!
Thread your needle with decent quality thread (50 weight cotton) and tie a knot at one end.
Fold over the seam allowance along one of the edges of the paper (if your paper piece has edges of different length it is a good idea to start on the longest edge).
Starting in the middle of the edge, stitch through all the layers with big basting stitches (1/4 inch or bigger) along the folded edge towards the first corner.
Turn the paper piece clock-wise (if right-handed) and then fold over the fabric at the corner, hold in place and place a stitch over the fold to secure it, but do not ‘back-stitch’! Smooth the fabric along the rest of the edge and do more basting stitches if necessary.
Turn the paper piece again clock-wise (if right handed) and fold over the fabric on the next corner, secure the fold with a basting stitch, then baste the rest of the edge. Continue in this fashion all the way around the paper shape. Most right-handed quilters find is easy to work their way around anti-clock wise, while left-handed quilters stitch in a clock-wise direction.
When you arrive at your starting point (the knot), finish off with an extra basting stitch (in the same direction) and snip off the thread (leaving an inch of ‘trailing end’, do not ‘cast off’). The basting stitches will be removed at a later stage (when the shapes have been sewn together). We do not cast-off or back-stitch in order to make the removal of the basting stitches easy – they can then simply be pulled out gently without damaging the paper pieces.
Pros and cons of the ‘Thread-basting’ method: The Thread-basting technique has stood the test of time and delivers great results for all types of paper piece shapes and sizes. The covered pieces can be stored for long periods of time without the basting stitches coming ‘undone’, and they can be easily removed after assembly and the papers can be re-used. Many quilters like the thread-basting process itself, as they find it soothing and calming for the mind. But some quilters find this process too laborious and time consuming, also because the basting stitches need to be removed again. Some are worried that the paper pieces will get too damaged when they stitch through the paper pieces to be able to re-use them.
Technique 2: ‘Corner-Catching’ method
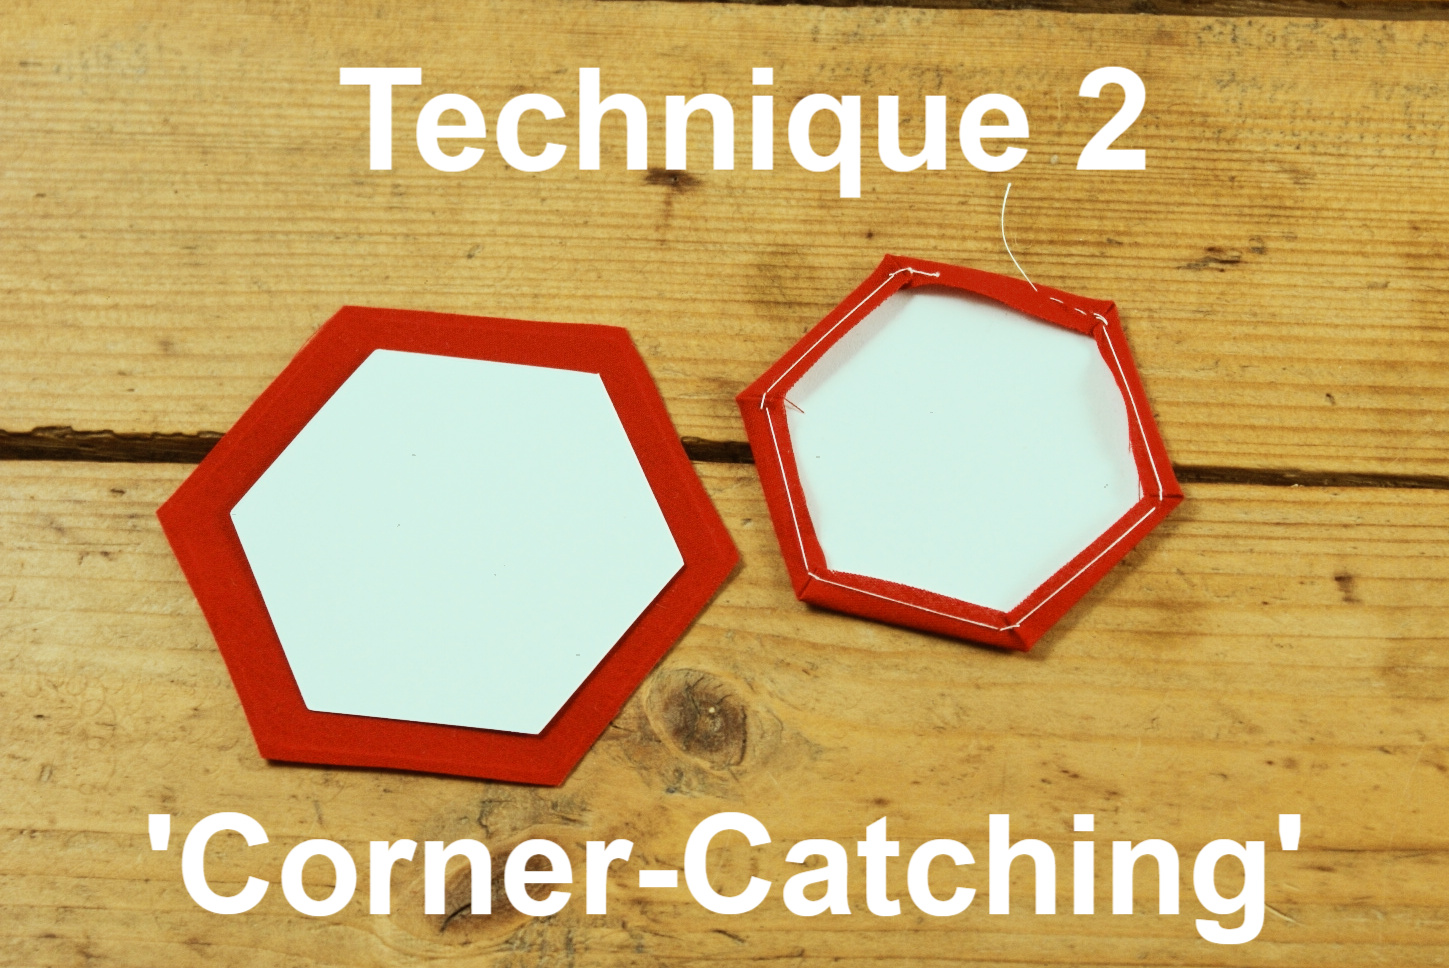
This technique is also traditional in EPP, using needle and thread, and is best suited for smaller sized paper pieces like Hexagons up to approximately 1-inch size (measured on the outside edge). Because this technique does not stitch through the paper, the fabric is not as well secured to the paper piece and it can ‘slip out’ if the shape is quite large.
Generally: As you baste your fabric to the paper piece always turn the paper piece clock-wise (if right-handed) and then fold over the fabric at the corner! All ‘folding’ should be done in the same anticlockwise direction (turn the paper piece, fold over at the corner, secure with stitching, turn the paper piece, fold over at the corner, secure with stitching etc.). This improves accuracy and avoids trouble in the future with ‘misfolded’ tails on shapes with ‘points’ (like Diamonds)!
Thread you needle with decent quality thread (50 weight) and tie a knot in the end.
We start at a corner of the paper piece and fold over the seam allowance of one edge, and then fold over the next edge (around the corner) and hold the fold in place. Put a ‘gathering stitch’ (which is in fact a ‘back-stitch’, or 2 stitches on top of each other!) through the fabric fold, avoiding the paper piece altogether.
Now turn the paper piece and fold over the next fabric edge at the next corner of the paper piece (making sure the paper piece has not slipped or moved!). Hold the fold in place the put a gathering stitch through that fold – You are essentially jumping from one corner to the next with your needle and thread.
Now turn the paper piece and fold over the fabric at the next corner, and again secure with a gathering stitch. Continue in this way all around the paper piece, dealing with one corner at a time.
When you arrive at the last corner, again fold and do the gathering stitch. Now place another (extra) gathering stitch on top of the first one and finish by ‘casting off’ (weave the needle through the seam allowance near the last stitch, picking up a few tiny stitches), pull the thread through and then cut the thread (leaving no trailing ends!).
These basting stitches will remain in the project, we do not remove them! The paper pieces are removed at a later stage (when the pieces are sewn together), by gently pulling them out through the ‘hole’ in the middle.
Pros and cons of the ‘Corner-Catching’ method: The Corner-Catching technique works very well for most small size paper shapes (1/2 inch to 1 inch size) and it has many followers in the EPP community. Because you do not stitch through the paper there are no basting stitches that need to be removed before the paper pieces can be released, and the papers are relatively unscathed and can be re-used. However, folding the fabric neatly and evenly around the paper piece takes a little practice and can lead to inaccuracies which usually become apparent when the pieces are sewn together later. It can be a more challenging technique to master for the beginner than ‘stitching through’ the paper pieces. Also: the fabric is not as firmly secured to the paper piece as in using the Thread-basting method, and therefore the paper piece can become dis-lodged before it is sewn into place, although this is most likely to happen with larger paper pieces (edges longer than 1 inch).
When the paper pieces become very small (less than approximately ½ inch) the technique again reaches some limits: It can be very difficult to remove the paper pieces unscathed and undamaged when they are almost ‘sewn in’ by the seam allowance and basting stitches.
Technique 3: ‘Glue-Basting’
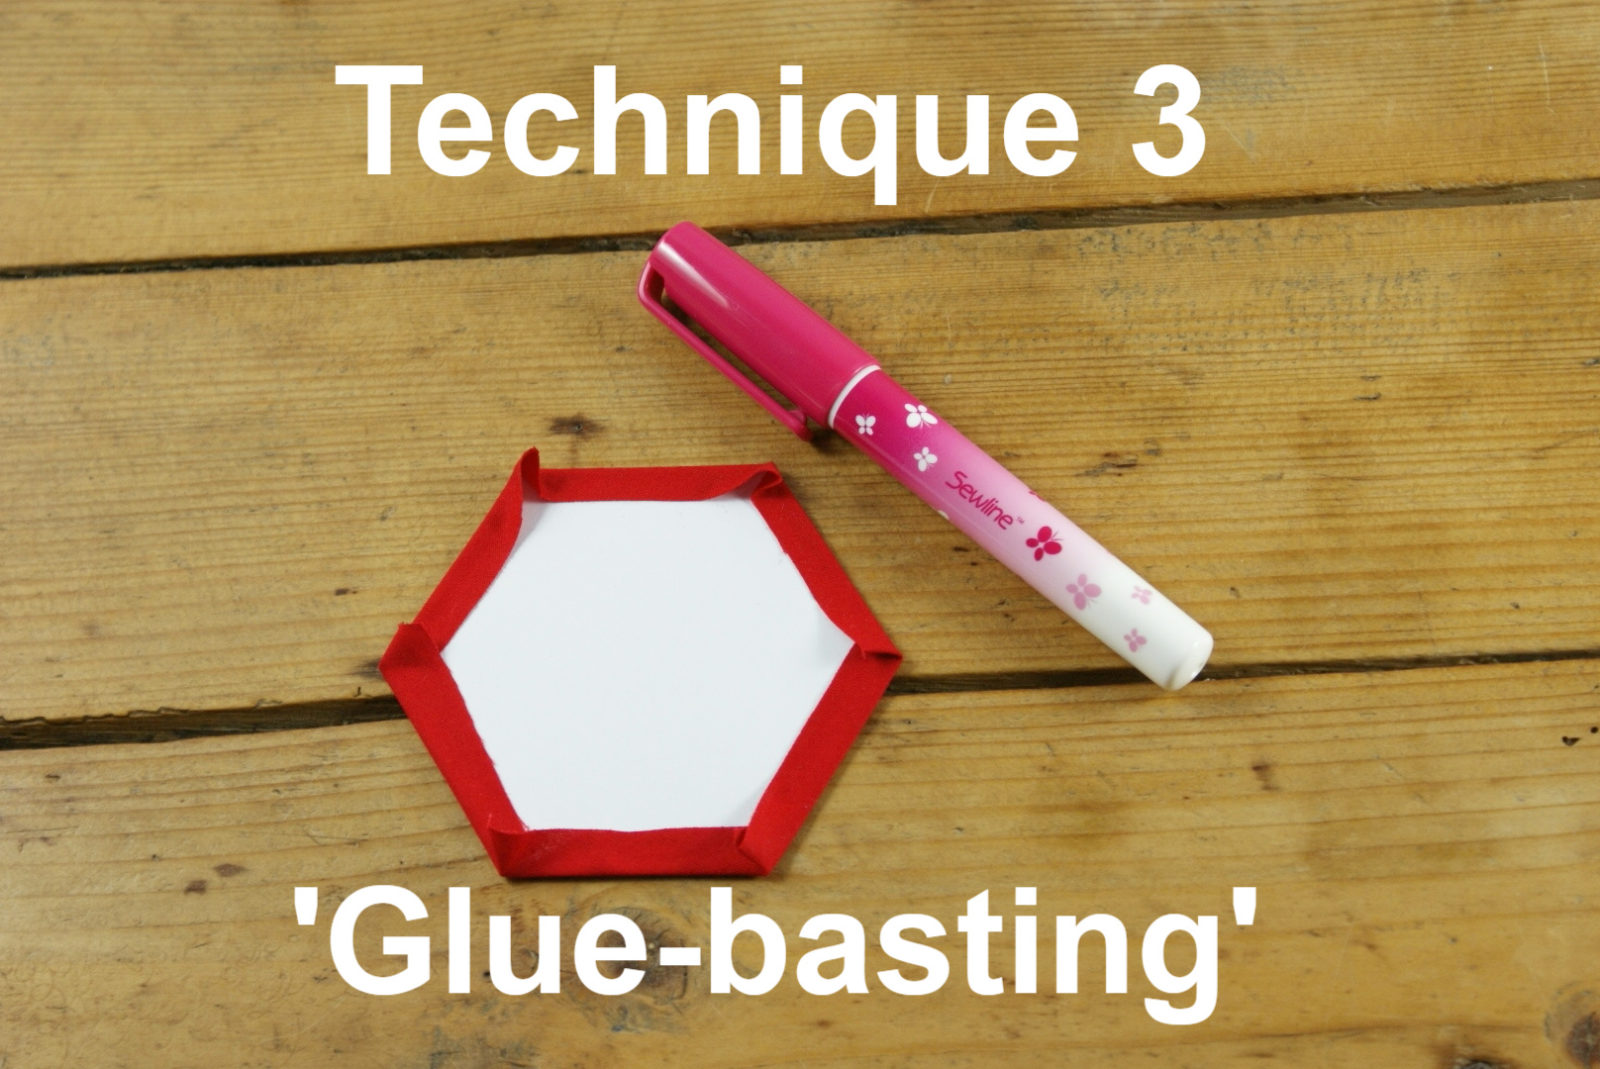
Broadly speaking, this basting technique is relatively new, but Glue-basting has been used in English Paper Piecing for approximately a decade now: Instead of using needle and thread you use a non-permanent glue (in a thin glue stick or pen) to secure the fabric to the paper piece.
Generally: As you glue-baste your fabric to the paper piece always turn the paper piece clock-wise (if right-handed). Apply the glue near the edge of the paper piece and then fold over the fabric and press down for a few seconds! All ‘folding’ should be done in the same direction, anticlockwise if you are right-handed: Turn the paper piece, apply the glue, fold over the fabric, turn the paper piece, apply the glue, fold over the fabric etc. This improves accuracy and avoids trouble in the future with ‘misfolded’ tails on shapes with ‘points’ (like Diamonds)!
To start, decide which edge to begin with, and if your paper piece has edges of different length it is a good idea to start on the longest edge.
Carefully apply some glue near the edge of the paper piece (not the fabric!) but avoid putting glue on the very edge itself because this may make it more difficult to remove the papers later (it may also gum up your needle when sewing the pieces together). Fold over the seam allowance along the edge of the paper and finger-press down for a few seconds. The glue is usually coloured, yellow or blue, so you can see where you have applied it, but once it dries it goes clear. It dries quite quickly, so it is a good idea to any apply it to one edge at a time (until you get the hang of using the glue pen).
Keep going along each edge until all sides are done.
Once the pieces are sewn together the paper pieces can be removed by ‘un-doing’ the glue-bond: this is best done by sliding (or scratching) a pin under the seam allowances along the edges, rather than ‘peeling back’ the fabric edges (which may lead to excessive fraying of the fabric).
Pros and cons of the Glue-basting method: The Glue-basting technique has many fans in the quilting community who think that it is the ‘fastest’ method: No needles need to be threaded, which can be a time saving factor itself, considering the degree of challenge and difficulty that can bring to some of us! The Glue-bond between the fabric and the paper piece is only temporary and can easily be ‘undone’, and the papers be removed and re-used. Experienced quilters can glue-baste many more shapes than thread-baste in the same time, and time is precious these days!
However, if too much glue is applied it can be very difficult to remove the paper pieces undamaged – and the Glue-pens then don’t last as long and Pen re-fills can be expensive. There are some tips to circumvent this problem, like having more than one glue pen and keeping them in the fridge to keep them cool: When you handle the glue pen you inevitably warm up the glue, which makes it softer and you can end up applying too much! On the other hand, if too little glue is applied then the papers can become ‘unstuck’ and dislodge before the pieces are sewn in. Some quilters also worry about the long-term effect of glue-residue on the fabric (although the glue should wash out easily, according to the manufactures). And using the wrong type of glue (in a misguided effort to save on cost) may make removal of the papers very difficult indeed.
The biggest potential problem with the glue-basting method is the tendency to end up ‘mis-folding’ the fabric on the corners of the paper pieces. This is a particular issue with shapes that have sharp ‘points’, rather than blunt corners, like Diamonds! These shapes end up having ‘tails’ when the fabric is folded around the points, and all these tails should ‘point in the same direction’. They will then ‘nestle’ neatly when the shapes are sewn together (for more details on this see article on ‘Points and Tails’). When the edges are not folded over ‘in sequence’, but rather ‘any which way’, the tails will point in different directions, which in turn will make sewing them together very difficult.
Getting started: Sewing together your pieces
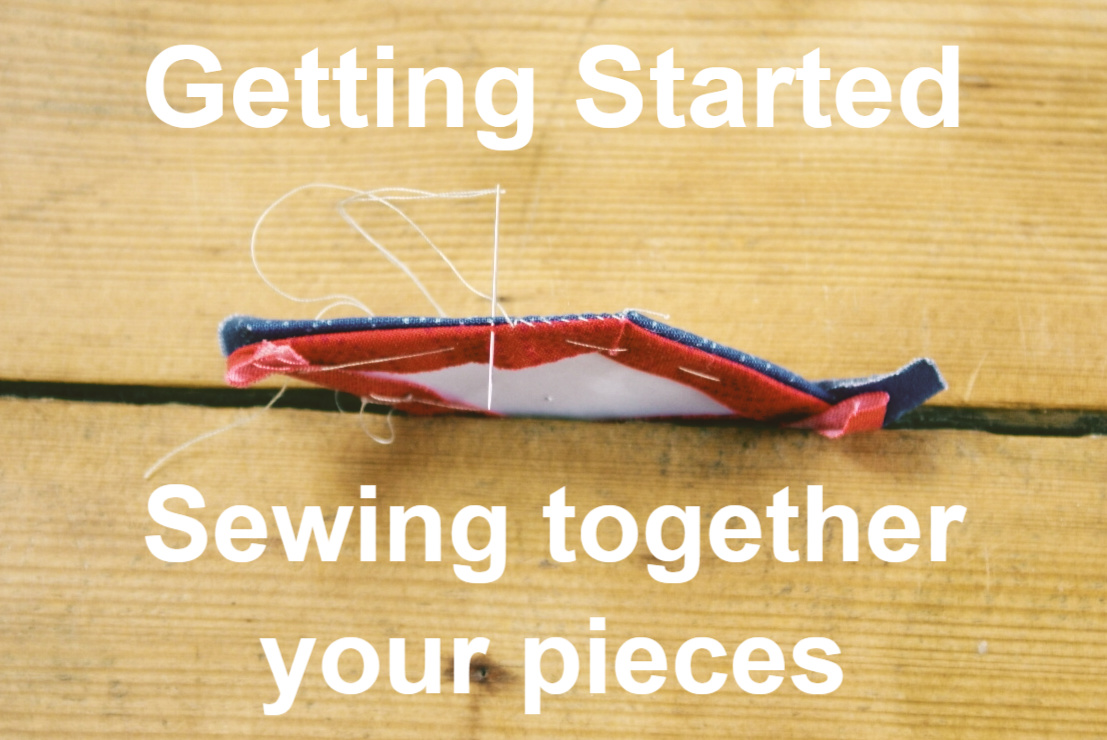
No matter which technique you have used to cover your paper pieces, once they are done you can start to sew them together by hand into fabulous patterns. ???? You should use a fine needle (because it makes the job easier) and good quality thread, like a 50 or 80 weight cotton (or polyester thread if you prefer) and choose a thread colour to match your fabric whenever possible. The most commonly used method uses a single strand of thread with a knot at one end.
Two paper pieces, which are to be sewn together, are placed ‘right sides together’ and the ends are carefully aligned.
Start with a ‘double-stitch’ or ‘anchoring’ stitch (essentially 2 stitches on top of each other) catching just the fabric edges of both pieces, avoiding the paper. Then work your way along the seam line ‘overcasting’ with small whip-stitches, always just catching the fabric edges of both pieces. About 6-10 stiches per inch (one every 2 mm) of seam line are enough! When you arrive at the far end of the seam again do an anchoring stitch – this is important because it stops the seam from unravelling when you fold it open. Now fold open the seam (looks good, doesn’t it? ????), add the next fabric covered paper piece (according to you pattern), lay it right sides together with the others and start you new seam with an anchoring stitch. Our beautiful patterns sometimes require us to sew Y-seams – which are easy by hand! It is perfectly fine and acceptable to ‘fold’ part of your project or individual paper pieces along the way if that makes sewing the seams easier.
Once a fabric patch is ‘sewn in’ on all sides the paper piece can be removed. If the thread-basting technique was used, the basting stitches will have to be removed first: Simply ‘snip’ the basting thread in a couple of places and pull them out (we snip the thread because that makes pulling it out very easy!). If you have used glue to baste your fabric to the paper piece, slide a needle or pin under and along the glued down seam allowance. Remove the paper piece and admire you work. The paper shape can be reused (unless it got too damaged).
Further reading: